
Introduction
Setting up a hands-on Active Directory (AD) lab is one of the best ways to understand Windows Server administration, domain services, DNS, and client–server authentication. In this article, I walk through how I installed Windows Server 2022 on VMware Workstation Pro, promoted the server to a Domain Controller, joined a client computer to the domain, and validated the setup by testing DNS connectivity and domain user sign-in using a test account named Jack Frost.
This lab was completed using multiple step-by-step screenshots, which I will reference throughout the article.
Lab Environment Overview
Hypervisor: VMware Workstation Pro
Server OS: Windows Server 2022
Client OS: Windows 10/11 (Domain-joined workstation)
Domain Name: testing.local (example)
Domain Controller Name: AD-Server
The environment consists of:
- One Windows Server 2022 virtual machine acting as the Domain Controller (DC)
- One client computer joined to the domain
Step 1: Installing Windows Server 2022 on VMware (AD1)
I began by creating a new virtual machine in VMware Workstation Pro and installing Windows Server 2022. During installation, I selected the Desktop Experience edition to allow GUI-based management using Server Manager.
After installation:
- The VM powered on successfully
- Initial administrator credentials were configured
- VMware tools were installed for better performance and display handling
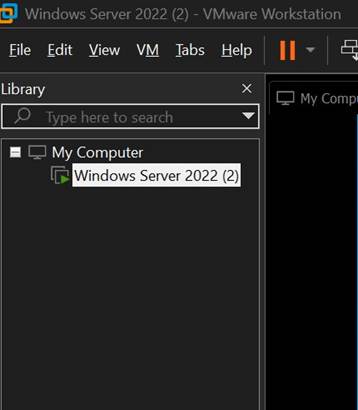
📷 Screenshot shows the Windows Server 2022 virtual machine running inside VMware Workstation.
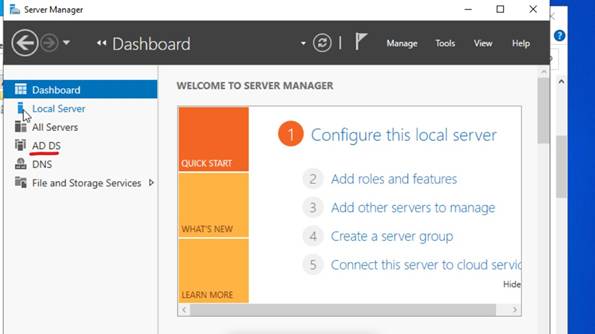
Step 2: Accessing Server Manager
Once logged in, Server Manager launched automatically. This is the central console used to configure roles, features, and manage the server.
From the Server Manager Dashboard, I verified:
- The server was online
- Network connectivity was functional
- No critical configuration errors were present
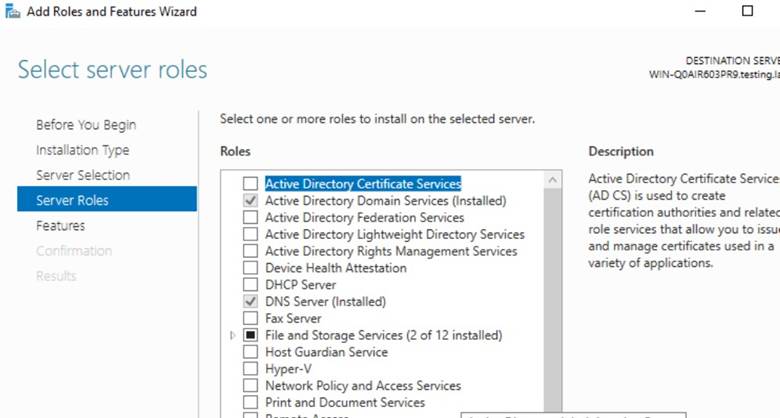
Step 3: Adding Active Directory Domain Services (AD3)
Using Server Manager, I selected:
Manage → Add Roles and Features
In the Add Roles and Features Wizard:
- Installation type: Role-based or feature-based
- Target server: Local server
- Server role selected: Active Directory Domain Services (AD DS)
During this process, the wizard automatically prompted me to install required features, including:
- DNS Server
- Group Policy Management
Step 4: Promoting the Server to a Domain Controller
After installing AD DS, Server Manager displayed a notification prompting me to Promote this server to a domain controller.
I selected:
- Add a new forest
- Root domain name: testing.local
Additional configurations included:
- Setting the Directory Services Restore Mode (DSRM) password
- Allowing DNS to be installed automatically
- Accepting default paths for NTDS database, logs, and SYSVOL
Once confirmed, the server rebooted automatically.
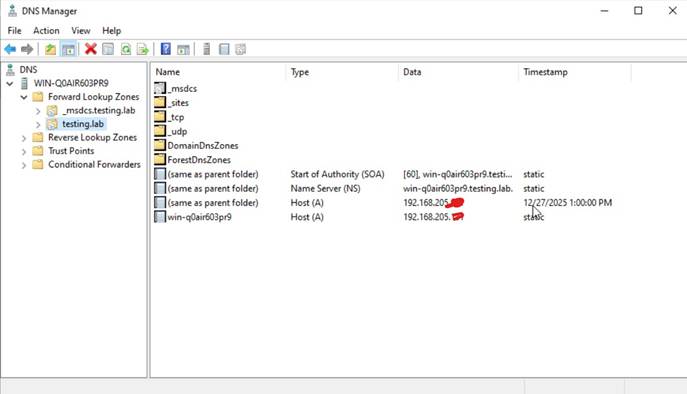
Step 5: Verifying AD DS and DNS Installation
After reboot, I logged in using the domain administrator account. In Server Manager, I confirmed:
- Active Directory Domain Services was installed
- DNS Server was installed and running
The left navigation pane now showed dedicated management consoles for:
- AD DS
- DNS
📷 Screenshots shows AD DS and DNS successfully installed.
Step 6: Creating a Domain User Account – Jack Frost
Using Active Directory Users and Computers (ADUC):
- I navigated to the domain container
- Created a new user named Jack Frost (among other users created).
- Assigned a password and appropriate user settings
This account was later used to test domain authentication from the client computer.
Step 7: Joining a Client Computer to the Domain.
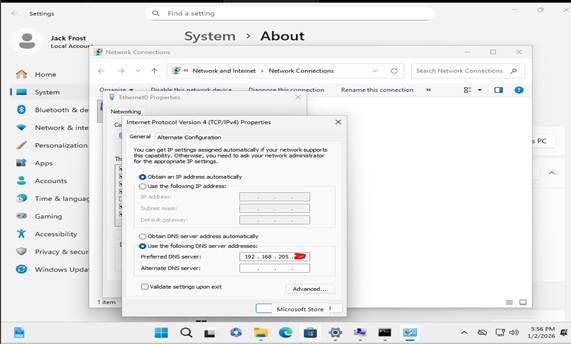
Screenshot showing Domain Controller’s IP address.
On the client machine:
- I verified network connectivity to the domain controller
- Configured the client’s preferred DNS server to point to the domain controller’s IP address
I then:
- Opened System Properties
- Changed the computer from a workgroup to the domain testing.local
- Entered domain administrator credentials when prompted
After a successful domain join, the client machine was restarted.
Step 8: Testing DNS and Network Connectivity
To confirm proper communication between the client and domain controller, I performed a connectivity test using ping:
- Pinged the domain name
- Pinged the domain controller hostname
Successful replies confirmed:
- DNS name resolution was working correctly
- Network connectivity between client and server was stable
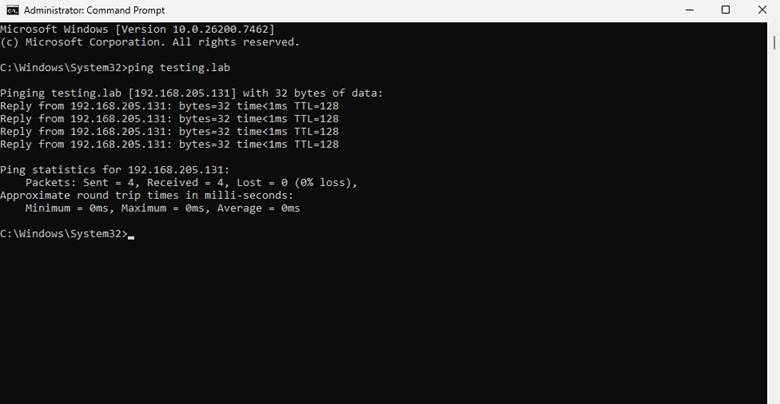
📷 Screenshot shows successful ping results to the DNS/domain controller.
Step 9: Logging in with a Domain User
Finally, I tested domain authentication by signing into the client computer using the domain user:
Username: testing\Jack Frost
The login was successful, confirming:
- The client trusted the domain
- AD authentication was functioning properly
- DNS and domain services were correctly configured
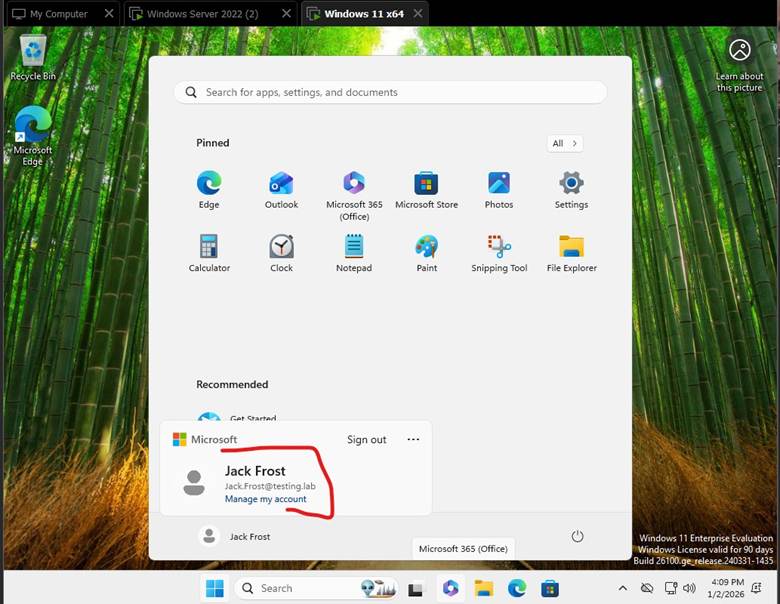
📷 Screenshot shows successful login using the Jack Frost domain account.
Conclusion
This lab demonstrates a complete Active Directory deployment using Windows Server 2022 in a virtualized environment. From installing the server OS to authenticating a domain user, each step validated a core concept of Windows Server administration.
By completing this setup, I achieved:
- A functional Active Directory forest
- A working DNS infrastructure
- Successful domain join and authentication
This type of lab is ideal for:
- Students learning system administration
- IT professionals preparing for certifications
- Anyone looking to strengthen their understanding of Windows Server and Active Directory

Leave a comment