My day-to-day work as a technical support professional involves some tasks in Microsoft Azure, but as we all know, the best way to learn is by doing and improving through practice. While exploring a GitHub portfolio, I found a set of Azure labs and decided to get my feet “wetter.” This particular lab focuses on creating and managing Microsoft Entra ID in Azure—a simple, beginner-friendly exercise that anyone new to Azure can complete.
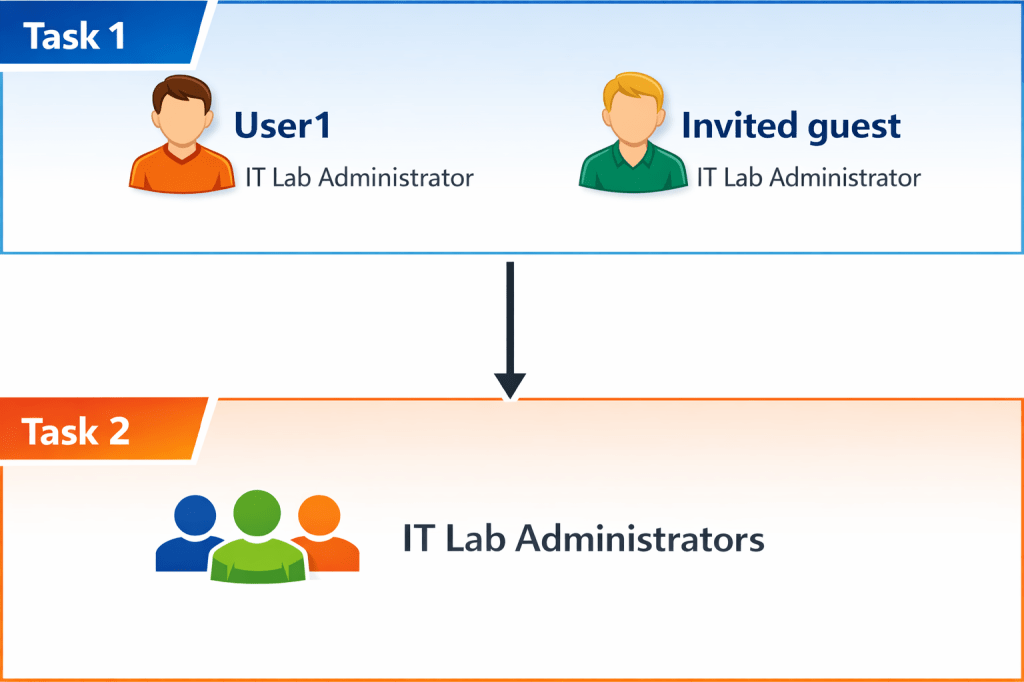
Task 1:
Your organization is building a new lab environment for pre-production testing of apps and services. A few engineers are being hired to manage the lab environment, including the virtual machines. To allow the engineers to authenticate by using Microsoft Entra ID, you have been tasked with provisioning users and groups. To minimize administrative overhead, membership of the groups should be updated automatically based on job titles.
- Create and configure user accounts
This task involves creating and configuring user accounts to maintain user details, including name, department, location, and contact information.
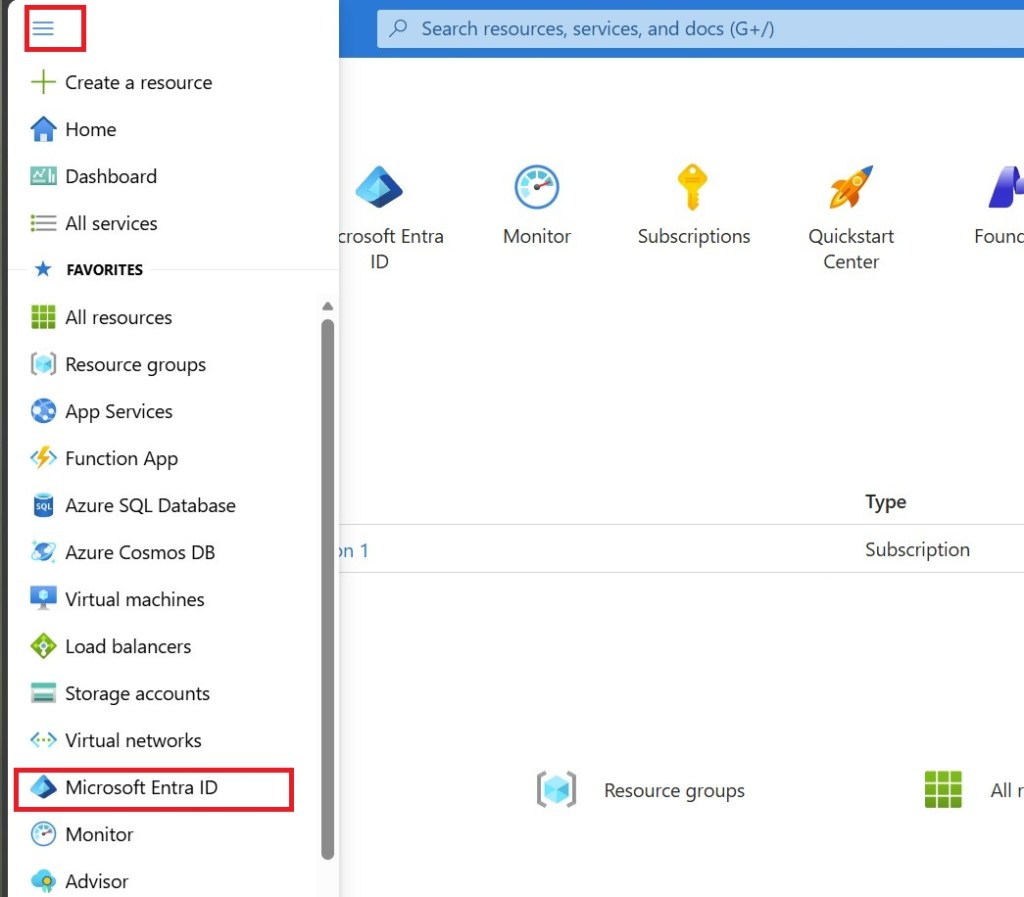
- Sign in to the Azure portal –
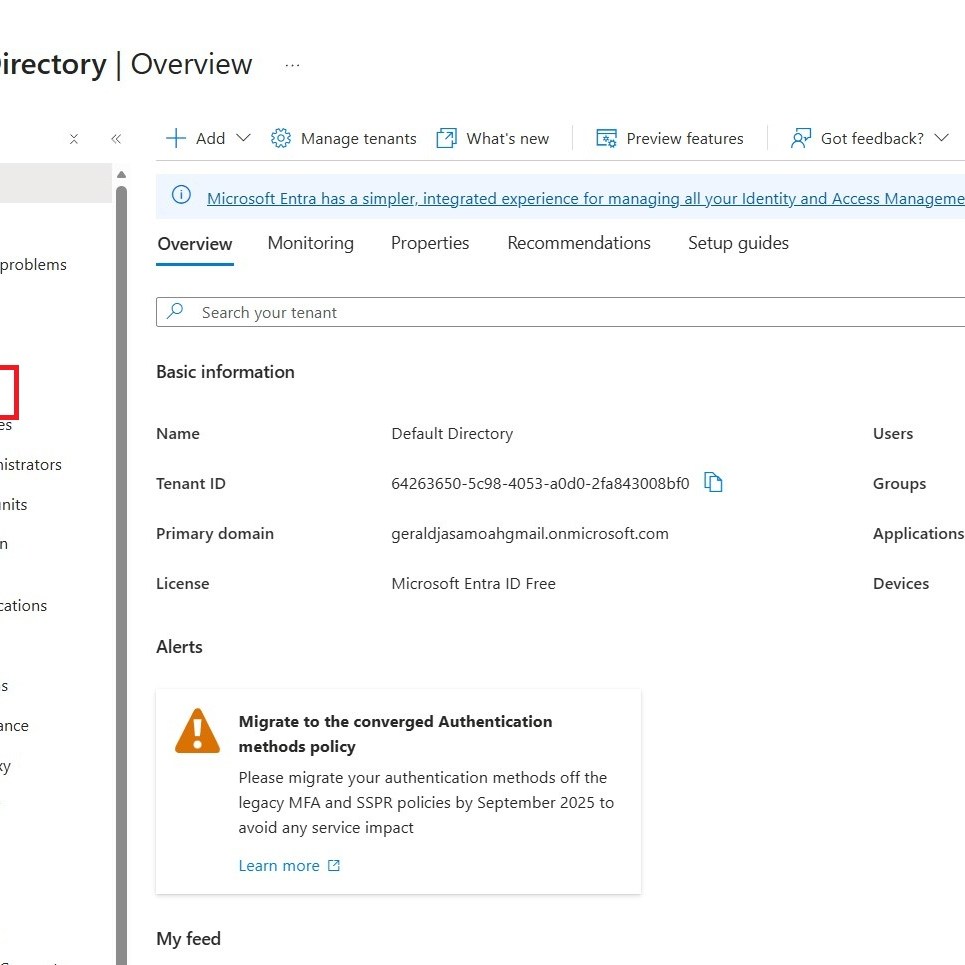
https://portal.azure.com. - Search for and select
Microsoft Entra ID. Microsoft Entra ID is Azure’s cloud-based identity and access management solution. Take a few minutes to familiarize yourself with some of the features listed in the left pane.
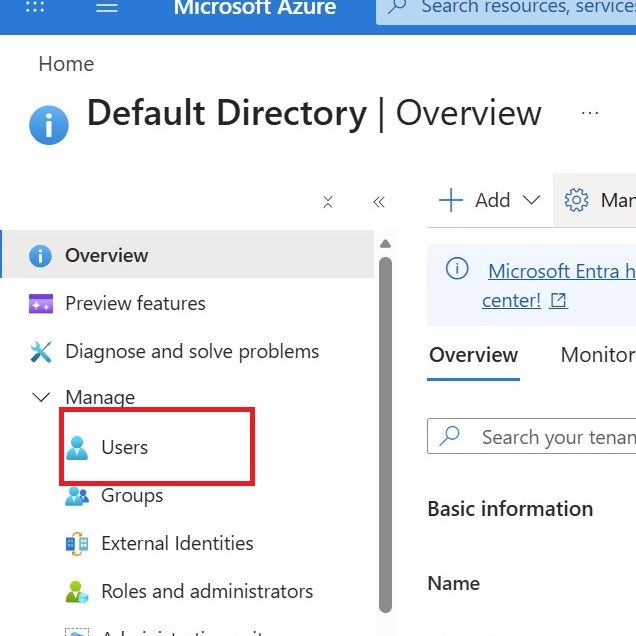
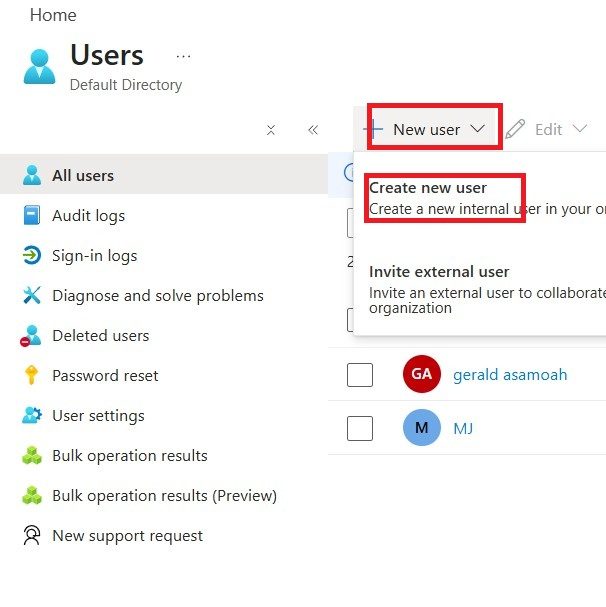
Create a new user
- From the Manage blade, select Users, and then select Create new user from the New user drop-down menu.
- Create a new user with the settings listed below, keeping all other settings at their default. Review the Properties tab to observe the different types of information that can be stored in the user account.
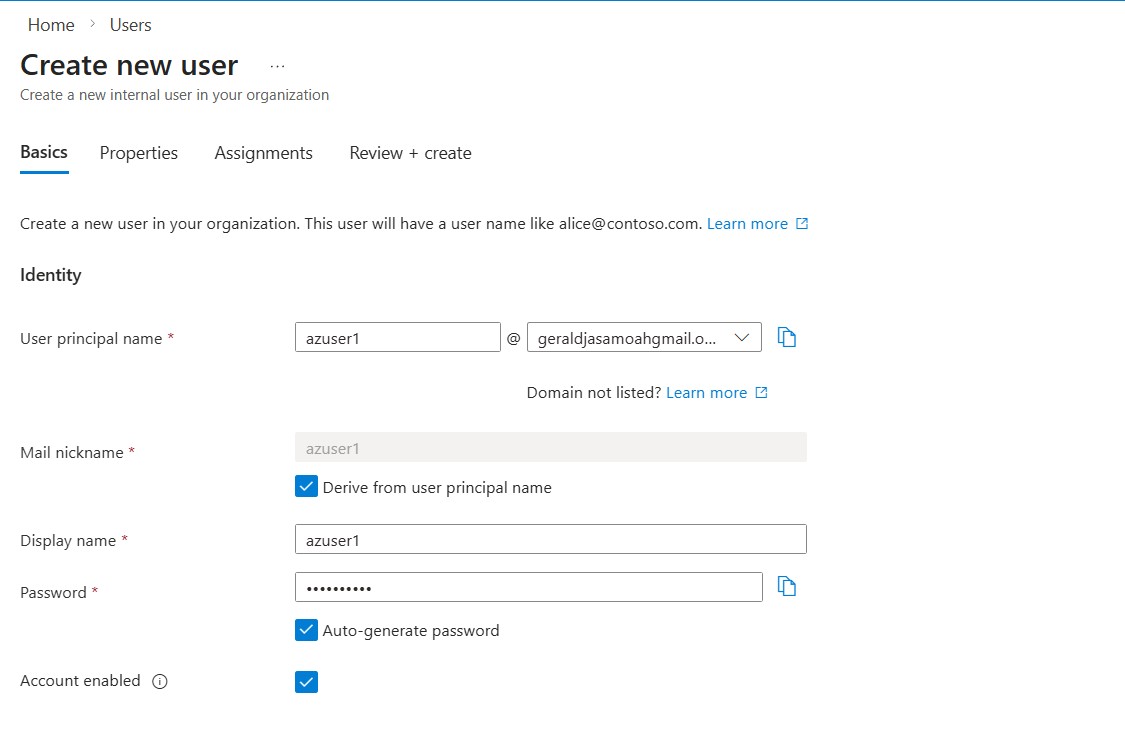
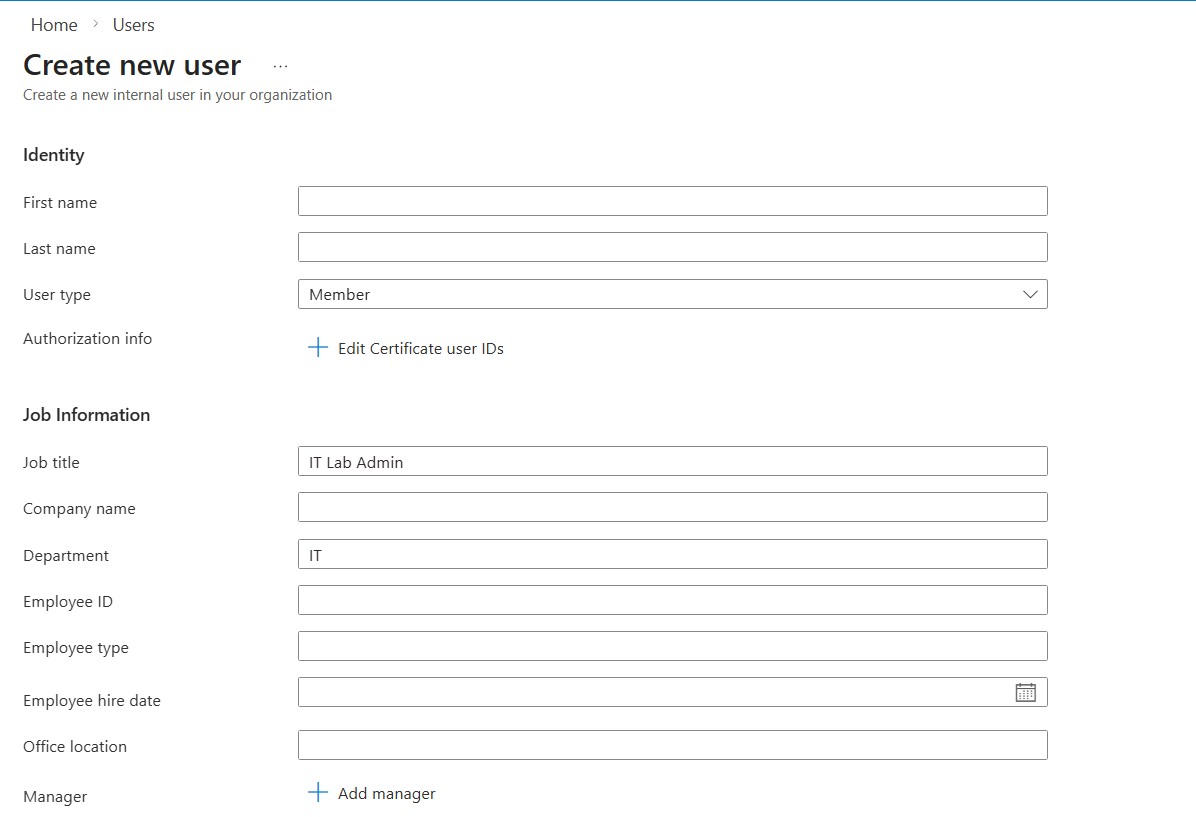
- Once you have finished reviewing, select Review + create and then Create.
- Refresh the page and confirm your new user was created.

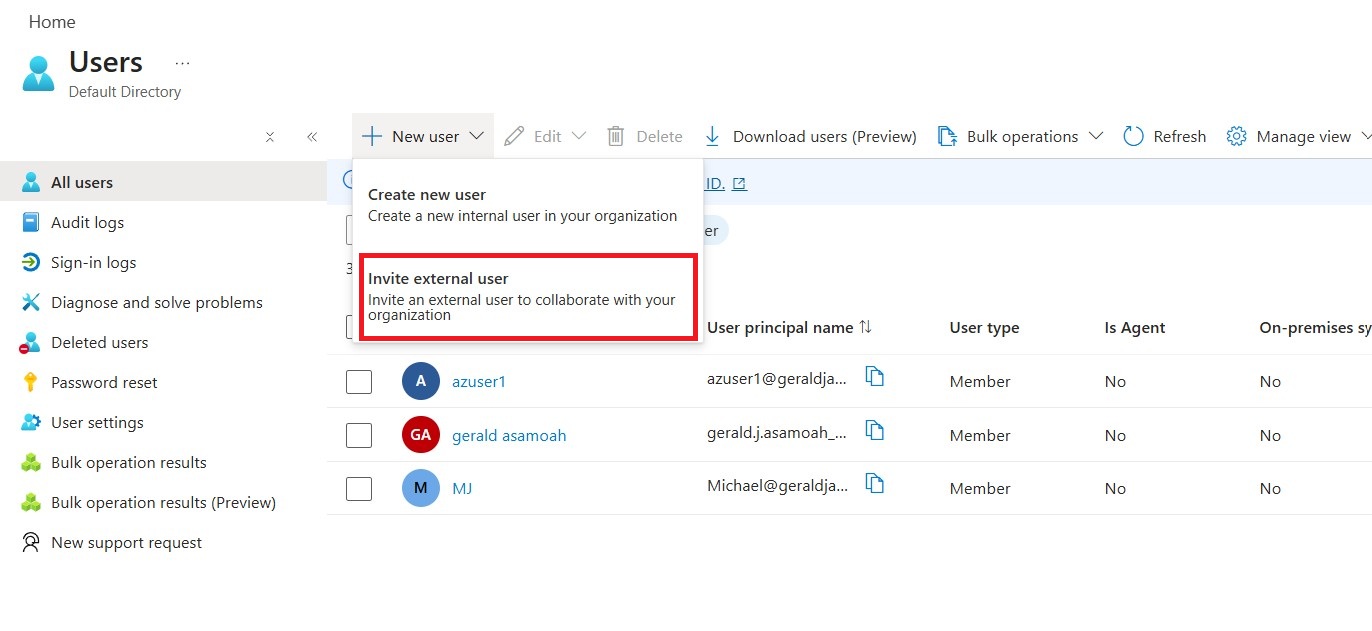
Invite an external user
- In the New user drop-down select Invite an external user.
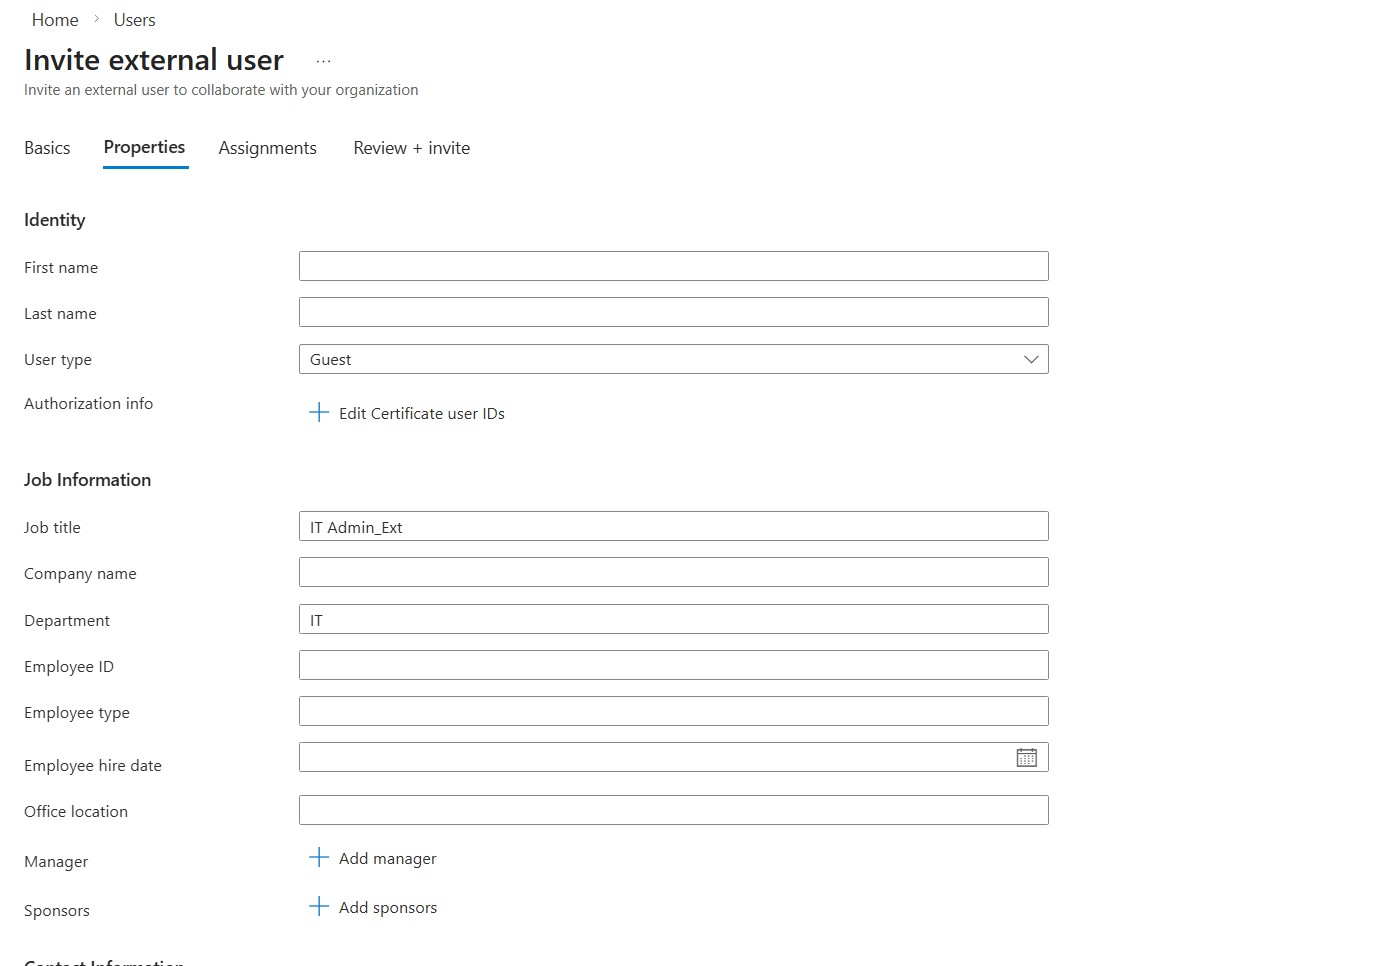
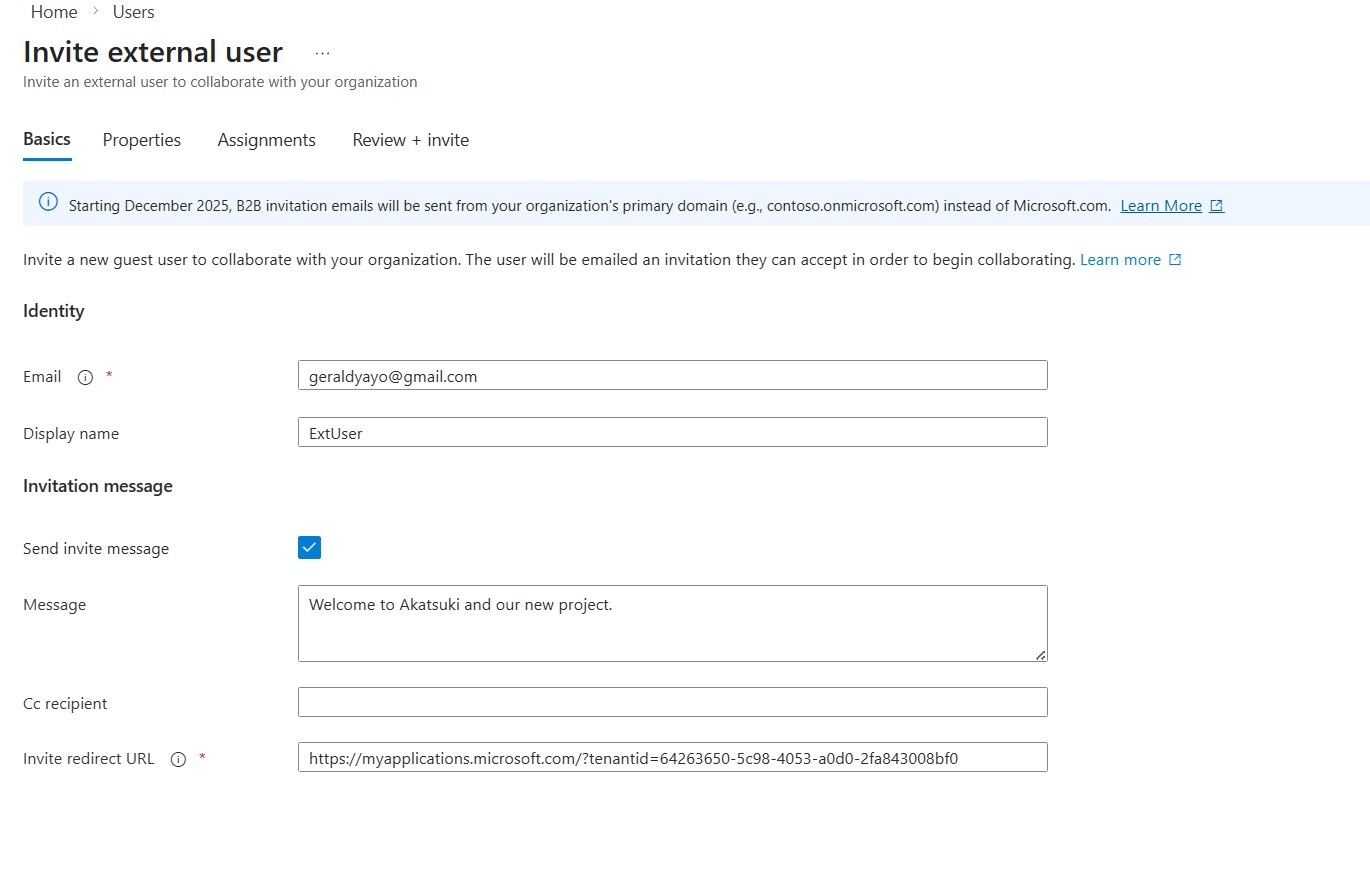
- Once you have entered the necessary details like above, select Review + invite, and then Invite.
- Refresh the page and confirm the invited user was created. You should receive the invitation email shortly.

Task 2:
This task involves creating a group account that can include user accounts or devices. Group membership can be assigned either statically or dynamically. Static groups are managed manually by administrators, whereas dynamic groups update automatically based on defined user or device properties, such as job title.
- In the Azure portal, search for and select
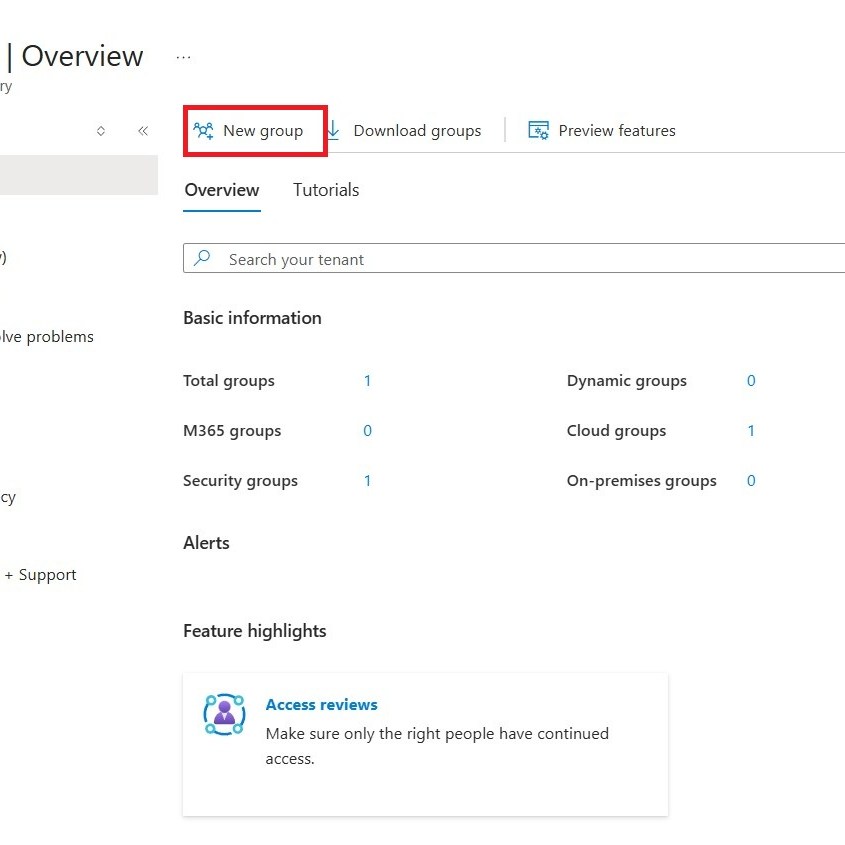
Microsoft Entra ID. From the Manage blade, select Groups. - In the All groups blade, select + New group and create a new group.
- You can now create a group with your own naming convention. See images below for an example. We selected the new user and external user we created earlier on in this lab.
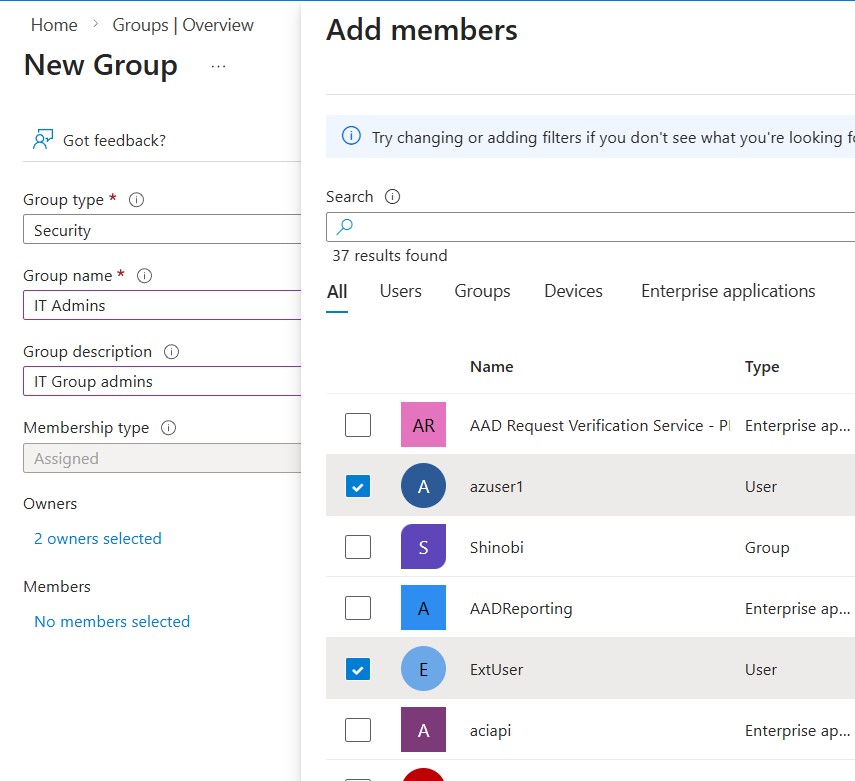
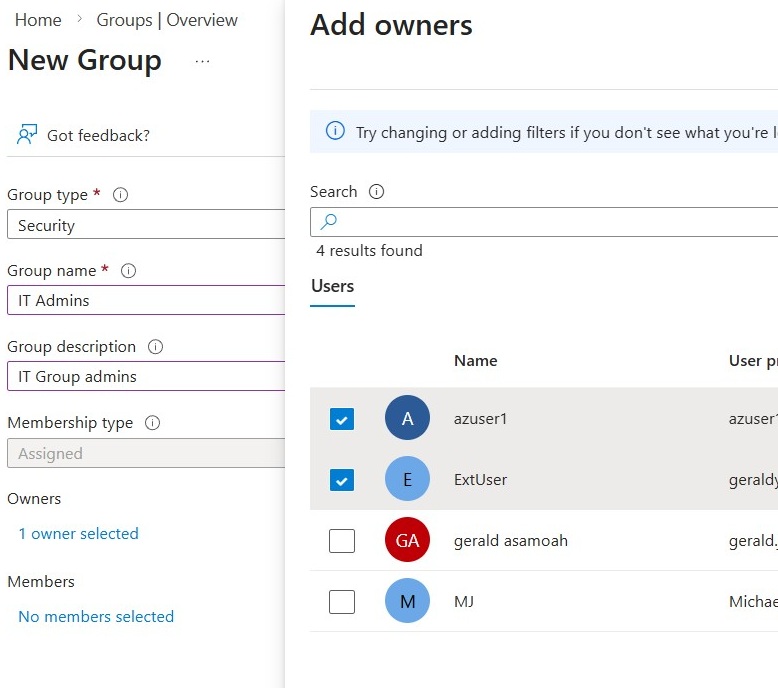
- Select Create to deploy the group.
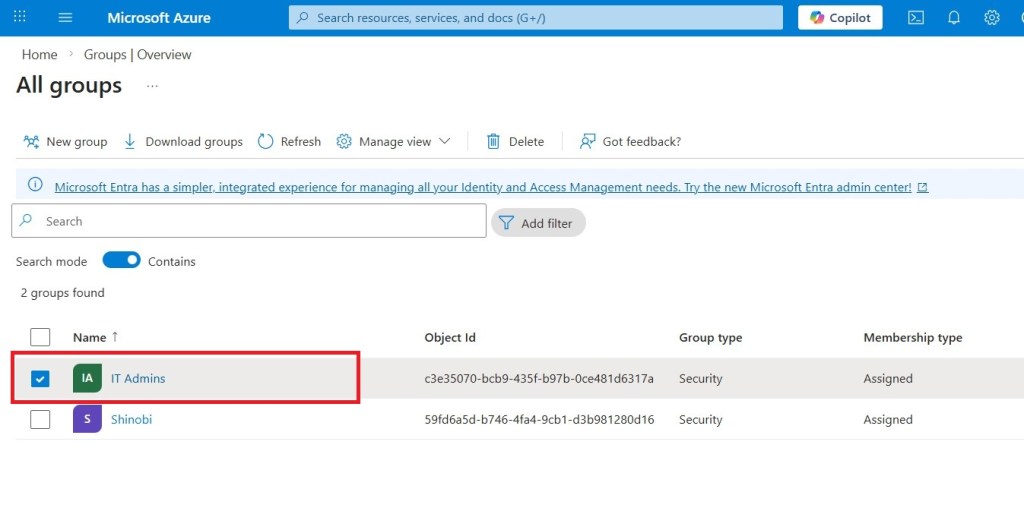
- Refresh the page to see the new group we created, IT Admins.
Key Takeaways
Congrats, lab is complete. Below are the core concepts covered:
- A tenant represents your organization and provides a dedicated instance for managing Microsoft cloud services for both internal and external users.
- Microsoft Entra ID supports both user and guest accounts, with access levels tailored to the responsibilities assigned.
- Groups are used to organize related users or devices and fall into two main categories: Security groups and Microsoft 365 groups.
- Group membership can be managed either manually (static) or automatically based on defined criteria (dynamic).

Leave a comment